Impact of using Selected Sites vs. Full Control
Before using Sites.Selected, keep in mind that Glean respects the permissions set in the original applications. Users will only see content in Glean that they have access to in those source systems. Also, remember that Glean’s Sensitive Findings provides a centralized dashboard designed to manage and protect sensitive data across all applications connected to Glean. Sensitive findings help detect and mitigate the risks associated with broadly shared or externally exposed and overshared sensitive data. Its primary focus is to ensure that your organization can maintain compliance with data protection regulations while enhancing the visibility and control of your data assets. The most important difference between the two options is that Sites.FullControl.All provides broad, automatic access to new sites and better search ranking resulting in happier users, while Sites.Selected offers granular control but comes with significant operational effort and major feature limitations.Sites.FullControl.All
- Grants full control over all SharePoint sites in the tenant. No need to manually add sites.
- Broad access: The application can manage all site collections and their content.
- One-time setup: Admin grants permissions once; new sites are automatically included.
- Enables Glean to gather activity data across all sites, which improves ranking and personalization.
- Supports webhook updates, so content and permissions are refreshed hourly.
- Admins can use greenlists/redlists to control which sites are crawled.
- Lower management overhead and fewer errors.
Sites.Selected
- Access is limited to specific SharePoint sites explicitly granted by the admin.
- Requires manual configuration for each site (via PowerShell), and Glean must be notified of changes.
- No automatic inclusion of new sites; admins must update the list and inform Glean for each new site.
- Glean cannot gather activity data (e.g., document views, modifications, shares) for these sites, which negatively impacts search ranking and personalization.
- No webhook support: Updates are only crawled every 24 hours, so changes are not reflected as quickly.
- Higher management overhead and more prone to errors or mismatches.
- Some customers have reported user confusion and degraded search experience due to missing content.
Comparison Table
| Feature | Sites.FullControl.All | Sites.Selected |
|---|---|---|
| Scope | All sites | Only specified sites |
| Setup | One-time | Manual per site |
| Automatic site detection | Yes | No |
| Activity data for ranking | Yes | No |
| Webhook support (fast updates) | Yes (hourly) | No (24h delay) |
| Management overhead | Low | High |
| Security risk (if not mitigated) | Higher | Lower |
| Supported by Glean | Yes | Yes |
Customer Experiences
- Most customers choose Sites.FullControl.All for better context and search quality.
- Some start with FullControl.All and switch to Sites.Selected for security, but saw degraded relevancy and switch to FullControl.
Security Mitigations for FullControl
- Use greenlists/redlists to restrict crawl scope.
- Apply IP restrictions to limit API calls to Glean infrastructure.
- Monitor and audit all access.
- Store credentials securely and rotate keys regularly.
Connect to SharePoint
These instructions leverage a limited Graph API permission scope via Sites.Selected, to explicitly grant access only to a particular Sharepoint site collection.Required permissions for setup
- The user setting up this data source must be the Global Admin.
Register a new app
- Sign into the Azure portal. Select Microsoft Entra ID, then Manage > App registrations > New registration.
-
On the Register an application page, register an app with the following:
Field Value Name Glean Supported account types Accounts in this organizational directory only (Single tenant) Redirect URI (Leave this field blank) -
Click Register.

Configure permissions
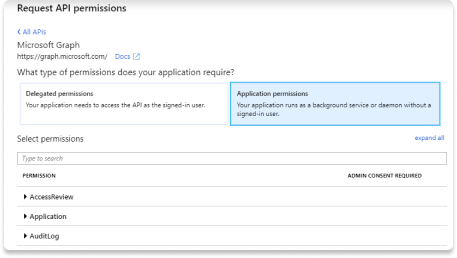
- On the left side navigation on the overview page, click on Manage > API Permissions.
- Click Add a permission and select Microsoft Graph. Choose Application permissions and add the following:
- User.Read.All
- GroupMember.Read.All
- Sites.Selected
- Reports.Read.All
- Member.Read.Hidden
- Click Add a permission and select Sharepoint. Choose Application permissions and add the following:
-
Sites.Selected
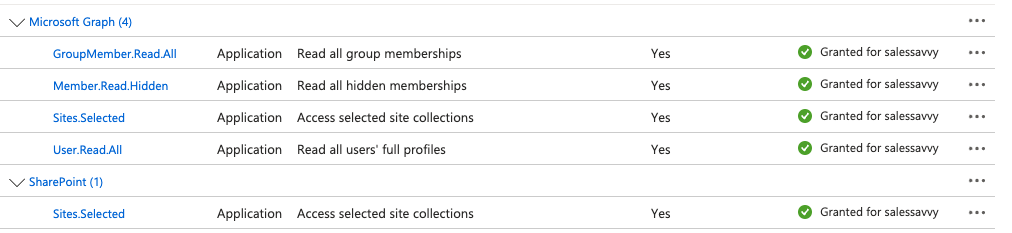
Grant admin consent
- Ensure you are signed into Azure as a Global, Application or Cloud Application Administrator.
- Use the search box to navigate to Enterprise applications. Select the Glean app you just created from the list of applications.
- Click on Permissions under Security. Review the permissions shown, and then click Grant admin consent.

Fill out keys
- Scroll to the top of the left sidebar and click Overview.
- Copy the following content from the center Essentials panel and enter it in Glean:
- Application (client) ID
- Directory (tenant) ID
- Enter your Sharepoint domain in Glean. Your Sharepoint domain should end with “sharepoint.com”
- Glean recommends 5 additional applications with the same permission settings as the initial app created to maximize crawl speeds. Repeat the setup steps from “Register a new app” until this step, saving the client ID and client secret in the process. Paste the client ID and client secret into the Glean web app.

- Ensure you go through the next steps to set up Sharepoint REST API permissions, or clicking Save will not succeed.
Grant REST API permissions to individual apps
Please complete these steps for each application created. This will require using PnP PowerShell. If you have already installed PnP PowerShell, you can skip the installation step.Install PnP PowerShell
- You will need to use Windows PowerShell 7 to use PnP PowerShell. PowerShell 7 is a side-by-side version with PowerShell 5.1 (reference). If you have not installed PowerShell 7, in your normal PowerShell, follow the installation instructions here.
- Run the following commands in PowerShell 7 to install PnP PowerShell.
Install-Module -Name PnP.PowerShellImport-Module PnP.PowerShell
Provision REST API permissions
In this section, you will grant the site collection permissions to the app created in Step 1 using PowerShell. You will first connect to PowerShell using an app that has sufficient permissions to grant site collection permissions to other apps. You could use the same app you just created in step 1 by granting it with extra permissions which you can later revoke after the setup. Within that session, you will then grant site collection permissions to the app created in Step 1.-
Upload the same certificate (
certificate.crt) that you generated previously to all applications. See the Upload Certificate to Azure step. Ensure that you have Sharepoint Powershell installed. If any of the following commands do not work, you may need to install the module first before running the commands again within Powershell. -
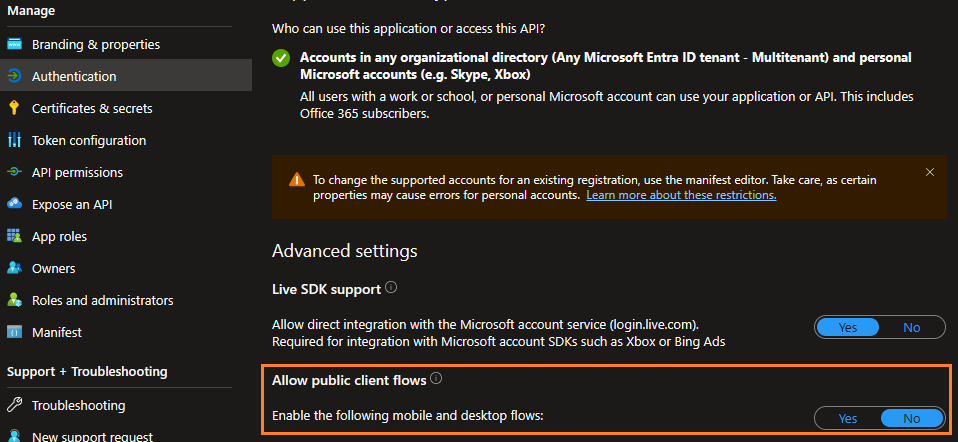
To allow a connection in PowerShell with the individual application, navigate to Authentication, click Settings and enable Allow public client flows section. This is temporary for step 3; you may toggle this back to Disabled after provisioning the service principal permission. Failure to do this may result in the following error message:
The request body must contain the following parameter: ‘client_assertion’ or ‘client_secret’ (documentation).
-
Connect to PnPOnline with the app that has sufficient permissions to grant site collection permissions to other apps.
This can be any app (ClientId) that has the below-mentioned permission scope applied to it.The client ID must have the Sites.FullControl.All (delegated permissions) permission scope applied to it. The Sites.FullControl.All (delegated permissions) permission is only required when granting the Full Control permission scope to the site collection in the next step.
You can choose either option and see which one works:
Connect-PnPOnline -Url $SITE_COLLECTION_URL -DeviceLogin -ClientId <clientId> -Tenant <tenantId>Connect-PnPOnline -Url $SITE_COLLECTION_URL -Interactive -ClientId <clientId>(See section Interactive Connection Troubleshoot if not working) -
Grant Full Control for the site collection to the app created in step 1:
This App ID must be the same app ID you entered in step 1.
Grant-PnpAzureADAppSitePermission -AppId $CLIENT_ID -Site $SITE_COLLECTION_URL -Permissions FullControl - Now, click Save in Glean to save the uploaded files and secrets. If all permissions have been provisioned appropriately, Glean should show a green dialogue indicating changes saved.
Provide the list of all sites to be crawled
Glean cannot automatically determine the sites with Sites.Selected permissions applied ahead of time. This requires configuration via the Manage Data tab.- Navigate to the Manage Data > Inclusion Rules tab. Provide the list of urls (can be just the subsites of the site collections with permissions) for the explicit sites to be crawled. If a site collection and all associated subsites should be crawled, provide all the urls explicitly in the greenlist.
Interactive Connection Troubleshoot
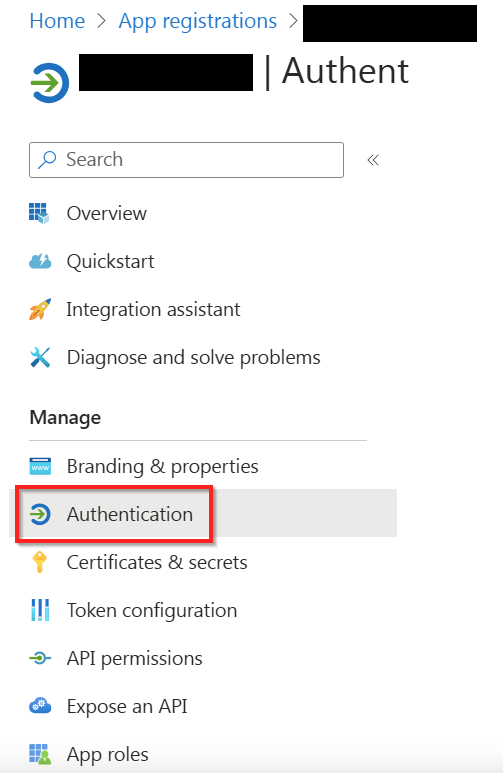
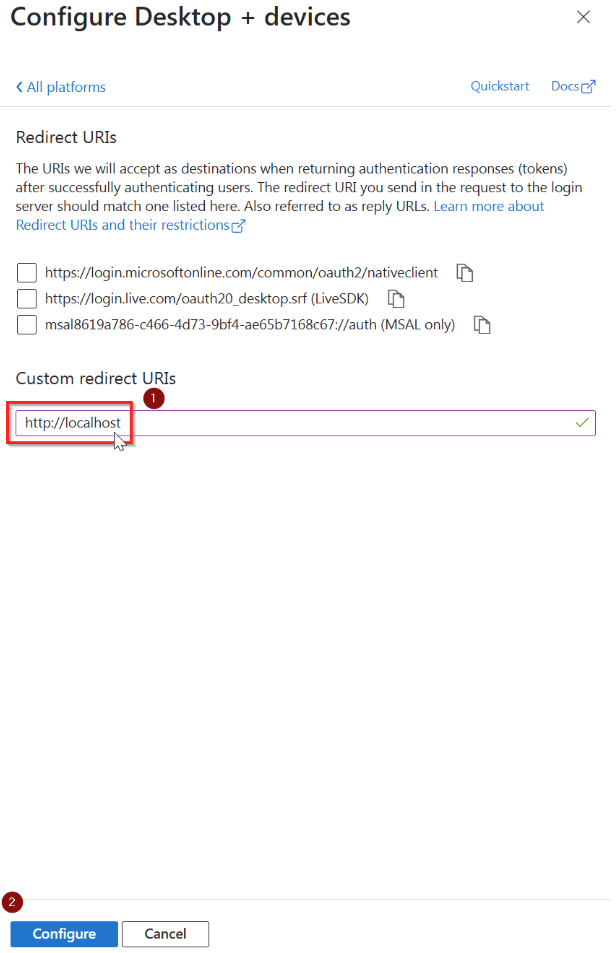
- On the azure portal, find the app you just created. In the menu, look for Manage and click on Authentication
- Under Platform configurations on the page, click on Add a platform

- In the panel that shows up on the right, click on Mobile and desktop applications
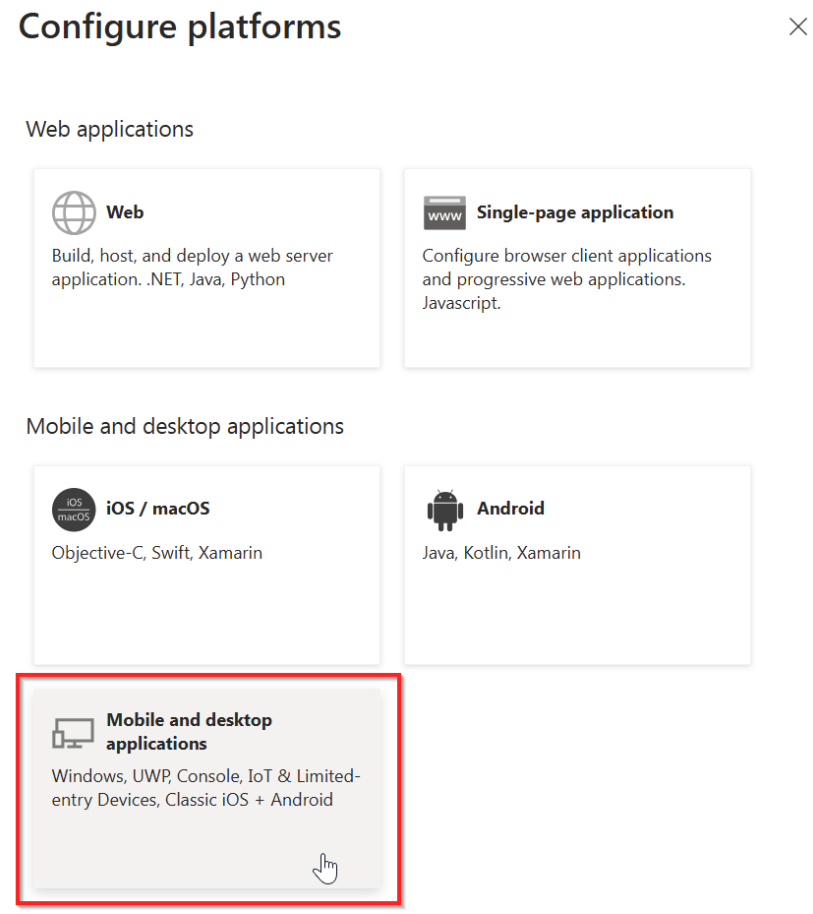
- Leave the three boxes shown in the panel on the right unchecked and in the Custom redirect URIs field, enter:
http://localhost. Note that this should really be http and not https - Click on Configure at the bottom
- Retry the command
Connect-PnPOnline -Url $SITE_COLLECTION_URL -Interactive -ClientId <clientId>